


Learn how to set up your first professional welding toolbox with essential tools, layout tips, and expert insights for beginners.
Walk into any fabrication shop and look around. The difference between a struggling beginner and a confident welder often shows up long before the first arc is struck. It shows up in the toolbox. The way tools are chosen, arranged, and maintained. A professional welding toolbox is not about excess. It is built on readiness, efficiency, and purpose.
For beginners, this part is often underestimated. Tools get tossed together. Critical items go missing mid-job. Small inefficiencies stack up fast. Over time, frustration replaces focus. It does not have to play out that way.
This guide breaks down how to build your first professional welding toolbox with intention. What belongs inside. What can wait. Where most beginners overspend. Where they cut corners and regret it later.
A professional welding toolbox is defined by function. It supports your workflow. It protects your tools. It adapts as your skills grow.
At a basic level, it should do three things well.
First, it organizes tools by task rather than size or appearance. Second, it protects precision tools from heat, slag, and impact. Third, it allows quick access without digging or improvising.
Many beginners assume bigger is better. That belief rarely holds. Oversized boxes encourage clutter. Smaller, modular setups tend to promote discipline and consistency.
Before loading a single tool, the box itself matters. Drawer depth, latch strength, and heat resistance all affect daily use.
Portable toolboxes suit field work and smaller shops. Rolling cabinets work better for fixed workstations. Hybrid setups, a main cabinet with a portable top box, often strike a balance.
It may be tempting to buy the cheapest option available, which usually leads to warped drawers, failing slides, and poor tool protection. A professional welding toolbox should feel stable when fully loaded without flexing, rattling, or compromising performance.
Some tools are non-negotiable. Others depend on welding style. For beginners, restraint helps.
Welding pliers appear simple. They are not. Good welding pliers cut wire cleanly, remove spatter from nozzles, and grip hot material without slipping. Cheap versions dull quickly and misalign under heat.
Investing early in quality welding pliers saves time and reduces rework. Many experienced welders replace these more often than expected, so durability matters.
Welding clamps do more than secure parts. They influence alignment and final weld quality. Inconsistent pressure leads to distortion. Beginners often overlook this.
A mix of C clamps, locking clamps, and quick-release welding clamps covers most starter projects. Avoid buying too many styles early. Learn which ones you reach for repeatedly.
Grinding is part of welding, whether welcomed or not. Welding grinder tools should be stored with care. Discs can crack, guards can loosen, and power cords can fray if tools are neglected.
Keeping grinder tools in a separate drawer or compartment reduces contamination from metal shavings. It also extends tool life. This is often ignored until a disc fails mid use.
It may be worth labeling drawers early. Not for aesthetics. For habit building.
Consumables get messy fast. Mixing them leads to waste.
Welding rods and welding electrodes are sensitive to moisture. Improper storage affects weld integrity. Beginners sometimes assume this only matters for advanced jobs. That assumption can cost time and quality.
Sealed containers with desiccant packs help. Even simple plastic tubes beat open drawers. Labeling by type and diameter prevents accidental misuse.
If you are running MIG, welding wire feeder components need clean storage. Dust and debris interfere with feeding. Tangles slow everything down.
Keeping spare liners, tips, and wire spools organized reduces downtime. It also makes troubleshooting easier when feed issues arise.
Tool placement should reflect the workflow. Tools used together should live together. Tools used rarely should not block daily essentials.
Below is a simple layout reference that many beginners find practical.
Top Tray: Welding pliers and measuring tools — kept for immediate access during setup.
Upper Drawers: Welding clamps and hand tools — placed for frequent adjustments during work.
Middle Drawers: Welding grinder tools — stored with controlled access to reduce dust exposure.
Lower Drawers: Welding rods and welding electrodes — kept low for stability and moisture protection.
Side Compartment: Welding wire feeder parts — stored separately to maintain cleanliness and organization.
No layout is permanent. It evolves. What matters is starting with intention rather than chaos.
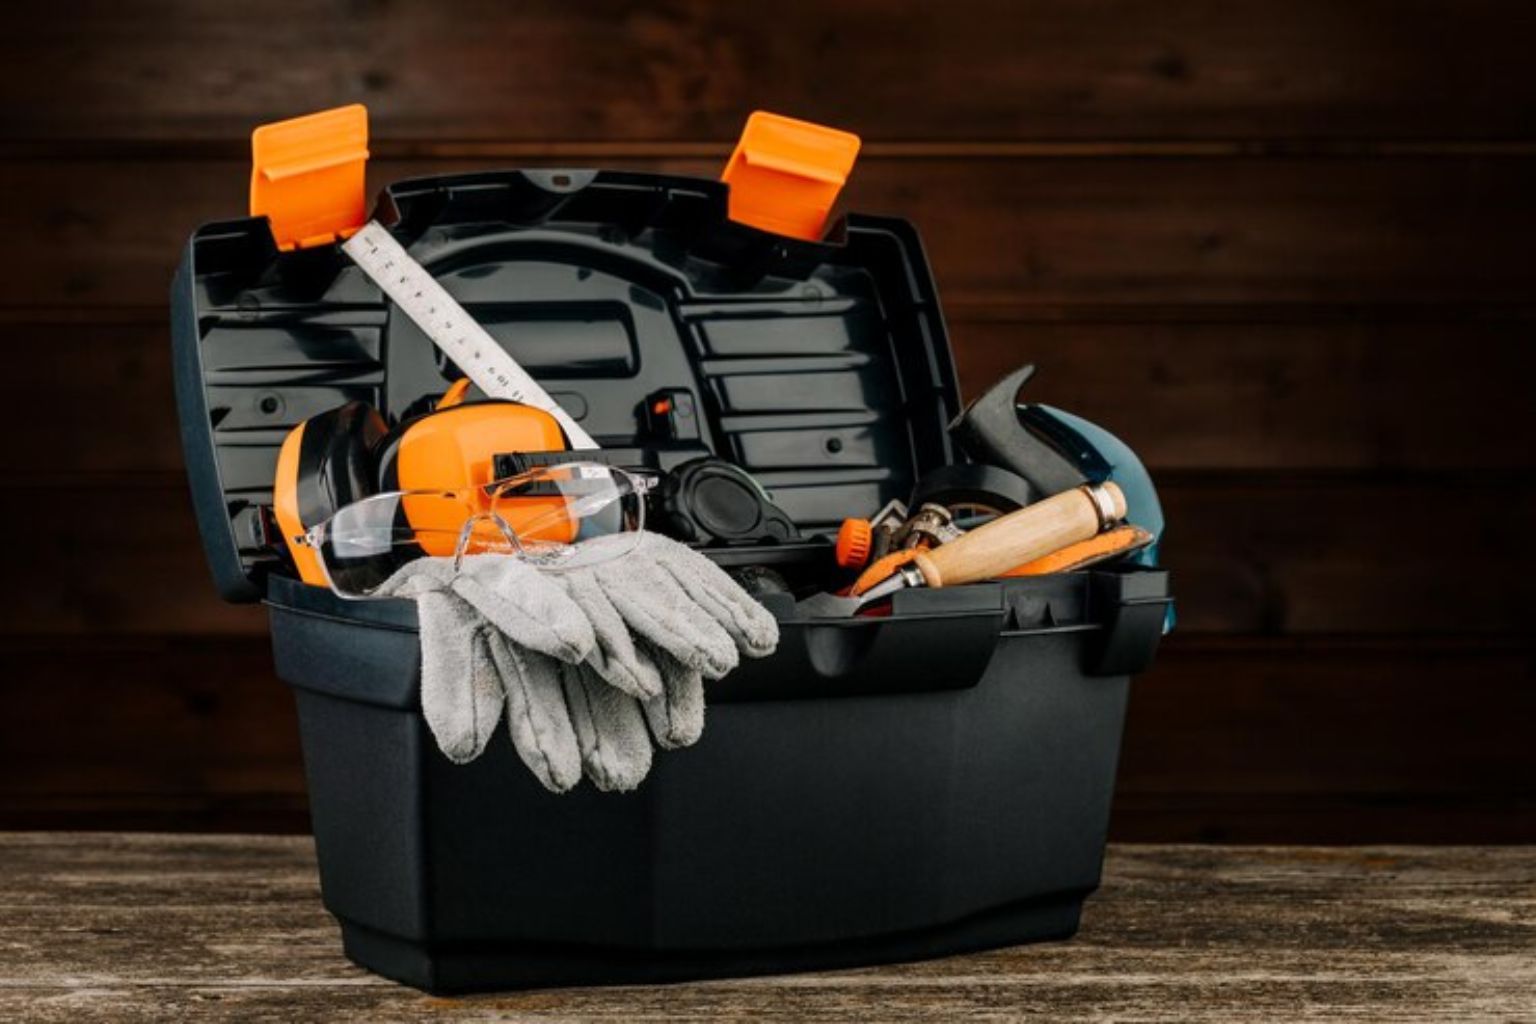
A professional welding toolbox should include safety gear. Gloves, lens covers, anti spatter spray, and ear protection. These are often scattered elsewhere, which creates delays and encourages shortcuts.
Keeping safety tools inside the toolbox reinforces good habits. It also signals professionalism in shared workspaces.
Some welders separate PPE entirely. That can work. But for beginners, proximity helps consistency.
There is a temptation to fill every drawer quickly. That urge usually fades after a few months of real work.
It is likely better to own fewer tools that perform reliably than many that fail under heat and pressure. Replace what breaks. Upgrade what limits you. Let experience guide expansion.
This approach aligns with how professional welding toolboxes evolve over time. They are built, not bought completely.
At some point, off-the-shelf tools start to feel limiting. Grip fatigue shows up. Durability issues repeat. Workflow friction becomes noticeable.
This is often when welders look toward brands designed by people who actually weld.
Developed by an experienced working welder and an engineer, Tentacle Tools focuses on firsthand jobsite experience. The focus stays on durability, comfort, and real-world use. No tool is released without being tested in actual welding conditions. For welders refining their professional welding toolbox, brands like this can simplify decisions without overcomplicating the setup.
Choose Tentacle Tools for jobsite-tested welding tools built for durability, comfort, and real-world performance.
A toolbox ignored becomes a liability.
Regular cleaning prevents buildup that damages tools. Quick inspections catch loose handles or worn jaws. Replacing small components early avoids bigger failures later.
Many professionals schedule a short weekly reset. Ten minutes spent wiping drawers and returning tools may seem insignificant, but over time, it makes a measurable difference.
Several patterns show up repeatedly.
Overbuying early tools that sit unused. Storing consumables improperly. Ignoring layout until frustration forces change. Treating the toolbox as storage rather than a working system.
Awareness alone helps avoid these traps.
How many tools should a beginner include in a professional welding toolbox?
Enough to complete common tasks without improvisation. Excess tools often slow beginners down.
Do welding rods and electrodes really need sealed storage?
Yes. Moisture affects performance even on basic projects.
Is a rolling toolbox necessary at the start?
Not always. Fixed workstations can work well with smaller setups.
How often should tools be replaced?
When performance degrades or safety becomes a concern. There is no fixed timeline.
Should safety gear be stored inside the toolbox?
It can be helpful, especially early on, to reinforce consistent use.
A professional welding toolbox is never finished. It reflects where you are in your craft right now, not where the market says you should be. Build it slowly. Adjust it honestly. Let it change as your skills do.
Explore insights, tips, and trends in tech and productivity!